Monday, August 10, 2015

Taking Care of Turtle

While huzz and I have been moved into our new home for over a year now, Turtle's home hasn't changed.  In fact, he has spent more than a year in his aquarium which sat on the floor of our living room...so classy.  I really wanted to give him some new digs but couldn't find a small table that fit my style, the bill, and could hold his heavy 10 gallon filled tank.

Enter my old beat up aquarium stand from my tweenage years.  This beaut used to sit at the end of my daybed with a 20 gallon freshwater tank atop it in my childhood underwater themed bedroom.  Eventually the only living fish in it was the algae eater and even that died.  I'm not a good fish Mom.  Luckily turtles are more resilient.  I remembered the shape of the stand and asked my parents if they still had it.  Lo and behold!


Rust covered and dirty, it was still in structurally good condition.  After Mom & Dad brought it over I cleaned it and gave it a good coat of matte black spray paint in the backyard and put a second coat on a couple hours later.


I measured the distances between the rails and thought for sure I could use a leftover 2x10 from our farmhouse table to be a tabletop.  I was a tad short because even though a board is called a 2x10 it's really more like 2x8 and some partial inches.  So we made a trip to Lowes and got a 2x12 which fit like a glove once cut to size. 


This was how I spent part of my 30th birthday.  I was told I should "do something I loved" on my birthday...which at the moment is using my new power tools and making things.  So while everyone in the nation was celebrating freedom and my birth (I'm a 4th of July baby) I was in the backyard using my power sander, staining the planks, and later on applying a spar varnish (the same from the farmhouse table).


I bought liquid nails thinking that would be how I'd secure the planks to the metal stand, but no need.  The stand is stable on its own so I didn't need any binder or screw to hold the planks in place.  They fit perfectly across the rails, so I let it stay that way.


Later on huzz gave Turtle's tank a ridiculously good cleaning and we hung some artwork above his abode.  The bottom shelf needs some styling but right now it's housing Turtle's tank things and his food and some cozy blankets for TV time.  Harry and I are big blanket fans.


Turtle seems pretty happy to be off the floor.  He actually can see our faces instead of our feet.  The only downside is he's losing his face to face time with Harry who would stick his nose into the small opening of Turtle's tank.  But now during TV time, Turtle can watch too!  And he does, I swear.  Turtle gives this project a high five!

Wednesday, July 29, 2015

Backyard Transformation!

Our backyard has recently gone through a major transition.  Upon moving in, a two foot concrete patio extended off the back of the house and the yard was stalks of alien Philadelphia weed that were taller than corn, taller than me.  Immediately the huzz sawed them down...using a hand saw no less and I attempted to dig up the roots which only created a ghastly dirt hole in the center of the yard.  The entire ordeal was eventually covered up by a super sketchy contractor who installed pavers while simultaneously wrecking the foundation of our house by the back entry.

Before!  Big Dirt Pile.
Since then, and since the wedding, it's been our primary project to get the yard spiffy enough for barbecuing and gardening.  Our first project involved building garden beds--similar to how I did them before.  I really wanted to bring the  boxes from our old place into our new backyard but they apparently have started to disintegrate.  It took one day to build two custom sized garden beds, and a couple days to fill them with dirt.  Bags of garden soil are ridiculously heavy.  We needed 18!

Veggie Box

Flower Box

There are a ton of tutorials for building these yourself but essentially you need to know how tall to make them depending on how deep the roots of your plants should go.  The veggie box (L shaped) is twice the depth of the flower box.  Other than that it's a series of ensuring square corners and screwing wood into little corner pieces that you can see above.

We also spent a long time painting the dingy concrete wall with outdoor paint.  I cut it in with a brush and huzz used the roller.  It was a post work activity that I zoned out doing.  We shared this job but worked individually...which was odd but it worked for us.

I knew I wanted to attempt to build something with all the tools I registered for from the wedding (clearly not a normal bride) and the first project was our Farmhouse Table.  We used free plans from Ana White that were so easy to follow.


Ana White's plan sheet gives you your shopping list, your cut list, and then step by step instructions throughout the whole project.  She makes it so that you're not buying excess wood and chopping it down to leave you with a ton of scrap.  The plans mentioned above utilized a pocket hole creator -- like the Kreg Jig.  

Once we had all our cuts, all the pocket holes drilled, and the notches for the base chiseled out we were ready to assemble with pocket hole screws and lots of wood glue.
 

A couple times we put pieces together backwards, which is all in learning how to follow plans, but we were able to fix our mistakes quickly.  The trouble started when we attempted to lift the 100% wood table after working in the heat all day.  Trouble for newlyweds.
Lifting furniture is probably one of the major causes of divorce.  The urgency and lack of communication is a fast lane to frustration and muscle fatigue.  Building this table resulted in a sad Sunday.  But later in the week once two coats of stain and poly were on and twinkle lights were strung, it was water under the bridge.  We are thoroughly enjoying our new-found paradise...can't even tell we live on the streets of Philly!


Wednesday, July 22, 2015

Club Wed Continued....

Like I said in the previous post, I didn't document all my DIY like I wanted to, but still want to share them and the tutorials that helped me along the way.  To start, we finally got our professional pictures!!  Our photographer was Aaron Almendral, and any amazing pic you see (vs ones from my phone) are his work.  He was seriously the best...very chill which was a nice counter to my manic panic...and willing to take a shot of anything, including my fur-baby.


Harry's sign was a DIY but from my brain.  A scrap of plywood with two holes drilled on the corners, some chalkboard paint slapped on, twine strung around and then written on with chalk marker made for a superb dog sign.  Ever read the comics on The Oatmeal?  We love the one about his dog and his erratic behaviors which inspired Harry's sign.


Chris and I created our own cocktail menu based on our world travels.  It was a fun way of personalizing the event and educated some of our wedding guests that may not have known Chris and I very well.  We invented appetizers from food we actually ate abroad and ran it past our caterer who was more than happy to oblige.  She and the chef loved our creativity.  Above is a tent sign I made using two pieces of scrap wood, chalkboard paint, a hinge, and two eye hooks with twine in-between to prevent the sign from flattening out.  No tutorial on this one but I do have crappy pictures of me cutting wood that I'll spare you from.


Guests found their seats via their place cards which I mini-clothes pinned to twine strung across an old frame (trash pick!).  I screwed eye hooks in the interior of the frame equal distance apart and then tied twine across.  The place cards were created via a DIY pack from Michaels--the cheapest option I came across aside from cutting poster board down.  The cards came with an online template to download into word.    Each guest had pre-chosen their meal which I recorded and indicated to the catering staff via a stamp of either a chicken or a fish.  


In addition to getting place-cards, guests were asked to sign in via our "wedding tree" which was hand drawn and designed by our most artistic family members.  Guests chose from an array of green inks to 'leaf a print' (get it?  GET IT?!) and sign below.  We're framing the drawing as a very special keepsake.  


We directed guests with tons and tons of signs.  That's one thing nobody tells you about wedding planning...you need to make a butt-load of signs to direct your guests around like lemmings.  Even with mega signage you'll also need a coordinator to move them around.  It might have something to do with the combination extreme happiness and alcohol.  I attempted to solve the issue with a multi-directional sign informing guests where it all was going down.  It involved cutting scrap plywood into rectangles, defining points to make an arrow, painting, staining, screwing, and yet another use for my chalk paint marker.  Since we weren't allowed to stake anything into the ground (venues have strange rules too) we had to make a 20 pound weighted cement and moss filled bucket to hold this thing in place.  Huzz did that for me in the same way he made the ones for our arch, except this one was permanent.  


Finally!  Time to party.  The hanging welcome sign was a clearance find at Burlington Coat Factory ($4 what up) probably because it was all scuffed and bent out of shape.  It fit perfectly with the vibe, so I used my trusty chalk marker to personalize it.  I googled a lot of welcome chalkboard signs to figure out what I wanted to do and kept the images on my phone while I meticulously copied onto chalkboard as best as I could.  Secret to my success!  


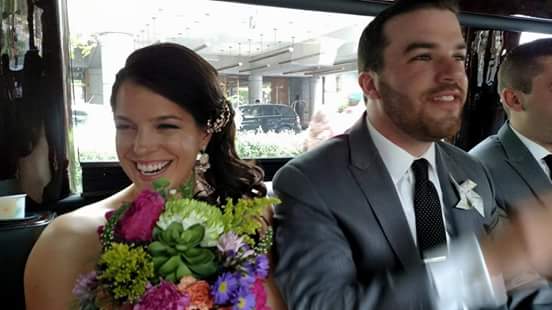
I had no idea what our flowers would look like before the day of our wedding.  I kind of didn't care--as I was more focused on my own flower project (the bouquets).  We found our florist via venue hunting, and he just happened to have a spot in the Rittenhouse Square and Clark Park farmers markets where we could visit him.  We said, "all colors!"  "whatever you think!" and ended up with bright, charming, arrangements with these crazy yellow flowers I didn't know existed.


The arrangements sat on slices of cedar cut by my grandfather on our family tree farm.  Not only did the place smell great, it was such a nice personal touch to the whole tablescape.  The runners were crafted by moi with burlap and white pom-pom fringe (available for resale as soon as I clean them all!).


Tables were identified with handmade nail, string, wooden table numbers--one of the very first things I made for the wedding back in April 2014!  They were a labor of love...and I still stare at them from time to time.  Bonus, they are for sale in my Etsy store (or if you just contact me).  


I really wanted a BAR marquee anyways for our eventual party basement and I thought it couldn't hurt to create one for the reception and keep it afterwards.  I used paper-machee letters from Amazon, drilled just enough holes for the string of lights I had gotten at an after Christmas sale ($2!), and spray painted a glossy red.  We had a full bar, but the most memorable drink was the groom's cocktail of honey whiskey, lemonade, and thyme.  It was gone before cocktail hour ended!  Ok we also have really boozy friends.


Across the dance floor behind the DJ booth was a festive tissue paper tassel garland I made from the millions of tutorials online (such a cheap and easy decoration).  In front of the DJ booth were these ridiculous LOVE letters I made.  They're very bold, but they turned out to be a really fun party prop as you can see.  They made it into the conga line too.  These were made via a tutorial from Green Wedding Shoes.


Last but not least, dessert!  We ordered a ton of donuts from our favorite spot in Reading Terminal Market.  I made a quirky Love is Sweet sign from foam board and string and a hot glue gun that was pinned to the table cloth in the dessert room.  The process was the same with the Mr. & Mrs. chair hangers....although I can't find pictures of them in action at the event.  I had used Fedex/Kinkos to print the words for me, and I traced them onto foam board.  Cut out with a serrated bread knife (it works great!) and strategically wrapped.  I got the words to stick together with a toothpick--that's how the S is attached to the L and the i is attached to the e and the w.  I ended up reinforcing with popsicle sticks behind.


And the LOVE letter display I had made on our return from Europe was placed in the dessert room too.  I was really really really happy to have everything created be out and about. That tutorial can be found on this blog, here.


And of course somewhere along the way our cake topper made itself onto donuts.  Harry and I made these with bamboo skewer sticks, string, and triangles cut out of our Europe maps.  Those maps were useful!  From boutonnieres, to signage, to cake topper...I think they got some wear.


And now...I think I'm done talking about the wedding!  Back to home projects and the like, of which I've been doing a lot of so hoping to share soon.  We were so fortunate for our bridal party who really put in a lot of sweat unpacking and packing up all the decor.  The amount you need even for a basic wedding is no joke, and thanks to specific instructions psychotically labeled on each bin of decor, the bridal party went to work.  It was unnerving for me to not assist, control freak that I am, but when I saw everything out I was extremely grateful.  Thanks guys!


Friday, June 19, 2015

Welcome Back from Club Wed

Oh hey there.  It's been a while.  As much as I can multi-task, blogging was one of those efforts that got swept under the rug while I spent three months prepping for the wedding and one month recovering.  I had hoped that I could come back with a bang and have professional wedding shots to share with you, but alas they take a while.  Maybe in another month!?

I spent the majority of my time in non-blog mode creating as much as I possibly could for our wedding--which was totally bloggable!  But in project-mode my focus was on getting it done, not sharing the process.  However, most of my creations came from other bloggers' tutorials which I figured I'd share.  For this post I'll just focus on the ceremony as there's so many crafts to post.  SO.MUCH.DIY.


To start we had to get married and we did so under the crafty arch I tutorial'd way back when.  I got the know how from following this tutorial from A Practical Wedding and made it my own to match the garden vibe of our venue.


Before this, our guests found their seats and did so around our aisle banner that was tied between the last two chairs on the aisle.  I found this idea and customized it based on this tutorial from Something Turquoise.


Guests were accompanied by programs fashioned into a fan....thank god.  Our wedding day was the hottest, stickiest, muggiest day of May peaking at about 95 degrees and humid.  There are so many program ideas out there and I just happened to find one that had a free template that I customized to our ceremony.  I even used the monogram created for us for our wedding invitations.  Printed these on cardstock, folded in half, and used packing tape to get a craft stick inside and then glued down the edges.


These were picked up on a little refreshment table done up with signage that offered tissues and vintage handkerchiefs I had picked up at a flea market for a song.  I clothes pinned them around an "apple picking basket" bought at Michaels.


Our bridal party rushed down the aisle as things got started late, and our ring bearers carried this down the aisle.  I made this DIY up as I went, creating a shape on burlap that I had leftover from table runners, folding it in half and sewing the edges together with a zig zag stitch.  Then I sewed the top together with enough space for a dowel to fit through.  The verbiage was puffy painted on in my best imitation calligraphy.


My niece was meant to follow the boys, but the line-up got out of whack despite rehearsal efforts.  I don't think anyone really noticed...it's amazing how much chaos is behind the scenes of "running smoothly".  Her little sign was an impulse $1 buy at AC Moore that I wrote on with chalk marker.  But her flower crown is based on a tutorial from one of my fave blogs, Honestly WTF.


One of the most fun projects, had it not been done at the last minute, was putting together the flowers for myself and the bridesmaids.  Such a valuable DIY!  It saved us at least $500 and now that I've mastered it I'm just waiting on friends to call on me to create something special for theirs.  I was inspired by this tutorial on Green Wedding Shoes and got the majority of my flowers from Produce Junction.  Whole Foods provided the peonies.  I also created charms for all the bridesmaids and myself so they could identify their bouquets later on.  I got the instructions and the idea from this tutorial at Something Turquoise.  Incredibly easy and very satisfying.  To boost the savings, I used faux succulents in the bouquets!  By adding wire and floral tape, I just clustered them into the bouquets.  I wrapped the girls' bouquets in black ribbon and used the cut hem of my dress to wrap my own (the seamstress gave me the idea!).


As for the boys' "flowers" I made them all pinwheel boutonnieres using the actual maps that guided Chris & I through the European adventure that ended in our engagement.  By following an easy pinwheel tutorial I figured out what size they should be.  Mini pinwheels went to the ring bearers.  Using hot glue I secured the paper and then glued a pin to the back so they stayed put the whole night.  You can kind of see Chris's pinwheel bout in the pic below.  So wish I had my professional ones!  Chris was the only pinwheel made from our map of Paris since that's where we got engaged.

Faux succulent right there!

And lastly, Chris and I read handwritten vows to each other that we had in our own little notebooks.  This was another really good project, because for the life of me my head was just one big buzz the entire day, and I can't remember what Chris said AT ALL.  Horrible I know.  But luckily we still have our books and I can read it anytime I want to kill him.  We each read our own summary (is that the best word?) that we individually wrote and then read joint vows/promises that we wrote together.  I used a free template from Something Turquoise to put ours together.  We also wrote our own ceremony that we guided Chris's grandfather through as he was our "officiant" though we used a Quaker self uniting license.  Totally the way to go for any non-denominational fiancees out there.


 And that was the ceremony!  So much work for 20 minutes--but that's why I was away and not posting updates.  For those wondering if I included Harry in the events, I did!  He was there pre-ceremony and we took some family pics together with his own DIY sign (of course).  He had his babysitter come get him (which we found through Dog Vacay, click on Services up top to learn more) right before things got started and spent the rest of the day frolicking.  I really wanted him to be in everything but knew that he might talk throughout the ceremony...which in hindsight probably would've helped me relax until I realized it was bugging people.  I'll post another update in the next couple weeks of the rest of the projects, and then back to what I really love writing about...HARRY!