I spent the majority of my time in non-blog mode creating as much as I possibly could for our wedding--which was totally bloggable! But in project-mode my focus was on getting it done, not sharing the process. However, most of my creations came from other bloggers' tutorials which I figured I'd share. For this post I'll just focus on the ceremony as there's so many crafts to post. SO.MUCH.DIY.
To start we had to get married and we did so under the crafty arch I tutorial'd way back when. I got the know how from following this tutorial from A Practical Wedding and made it my own to match the garden vibe of our venue.

Before this, our guests found their seats and did so around our aisle banner that was tied between the last two chairs on the aisle. I found this idea and customized it based on this tutorial from Something Turquoise.


Guests were accompanied by programs fashioned into a fan....thank god. Our wedding day was the hottest, stickiest, muggiest day of May peaking at about 95 degrees and humid. There are so many program ideas out there and I just happened to find one that had a free template that I customized to our ceremony. I even used the monogram created for us for our wedding invitations. Printed these on cardstock, folded in half, and used packing tape to get a craft stick inside and then glued down the edges.


These were picked up on a little refreshment table done up with signage that offered tissues and vintage handkerchiefs I had picked up at a flea market for a song. I clothes pinned them around an "apple picking basket" bought at Michaels.

Our bridal party rushed down the aisle as things got started late, and our ring bearers carried this down the aisle. I made this DIY up as I went, creating a shape on burlap that I had leftover from table runners, folding it in half and sewing the edges together with a zig zag stitch. Then I sewed the top together with enough space for a dowel to fit through. The verbiage was puffy painted on in my best imitation calligraphy.

My niece was meant to follow the boys, but the line-up got out of whack despite rehearsal efforts. I don't think anyone really noticed...it's amazing how much chaos is behind the scenes of "running smoothly". Her little sign was an impulse $1 buy at AC Moore that I wrote on with chalk marker. But her flower crown is based on a tutorial from one of my fave blogs, Honestly WTF.


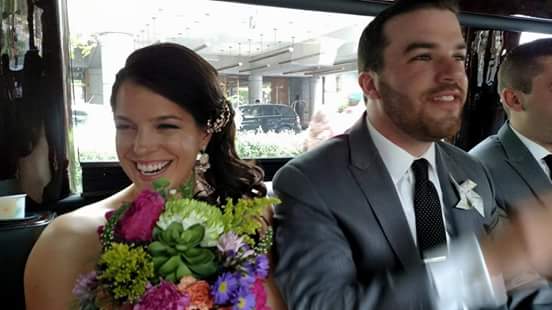
One of the most fun projects, had it not been done at the last minute, was putting together the flowers for myself and the bridesmaids. Such a valuable DIY! It saved us at least $500 and now that I've mastered it I'm just waiting on friends to call on me to create something special for theirs. I was inspired by this tutorial on Green Wedding Shoes and got the majority of my flowers from Produce Junction. Whole Foods provided the peonies. I also created charms for all the bridesmaids and myself so they could identify their bouquets later on. I got the instructions and the idea from this tutorial at Something Turquoise. Incredibly easy and very satisfying. To boost the savings, I used faux succulents in the bouquets! By adding wire and floral tape, I just clustered them into the bouquets. I wrapped the girls' bouquets in black ribbon and used the cut hem of my dress to wrap my own (the seamstress gave me the idea!).


As for the boys' "flowers" I made them all pinwheel boutonnieres using the actual maps that guided Chris & I through the European adventure that ended in our engagement. By following an easy pinwheel tutorial I figured out what size they should be. Mini pinwheels went to the ring bearers. Using hot glue I secured the paper and then glued a pin to the back so they stayed put the whole night. You can kind of see Chris's pinwheel bout in the pic below. So wish I had my professional ones! Chris was the only pinwheel made from our map of Paris since that's where we got engaged.
 |
| Faux succulent right there! |
And lastly, Chris and I read handwritten vows to each other that we had in our own little notebooks. This was another really good project, because for the life of me my head was just one big buzz the entire day, and I can't remember what Chris said AT ALL. Horrible I know. But luckily we still have our books and I can read it anytime I want to kill him. We each read our own summary (is that the best word?) that we individually wrote and then read joint vows/promises that we wrote together. I used a free template from Something Turquoise to put ours together. We also wrote our own ceremony that we guided Chris's grandfather through as he was our "officiant" though we used a Quaker self uniting license. Totally the way to go for any non-denominational fiancees out there.

And that was the ceremony! So much work for 20 minutes--but that's why I was away and not posting updates. For those wondering if I included Harry in the events, I did! He was there pre-ceremony and we took some family pics together with his own DIY sign (of course). He had his babysitter come get him (which we found through Dog Vacay, click on Services up top to learn more) right before things got started and spent the rest of the day frolicking. I really wanted him to be in everything but knew that he might talk throughout the ceremony...which in hindsight probably would've helped me relax until I realized it was bugging people. I'll post another update in the next couple weeks of the rest of the projects, and then back to what I really love writing about...HARRY!